
How’s everybody doing on this fine day in 2021? I just wanted to take a moment to show you how I like to waste my time—haha! Just kidding, I don’t actually consider it a waste. I just love doing crafty things. It’s what gives my life meaning and purpose. Truly, I live from project to project. That’s how I like it. And I’m always thinking of crazy new ways to get paint all over my hands. This time I made a figurine. Check it out…

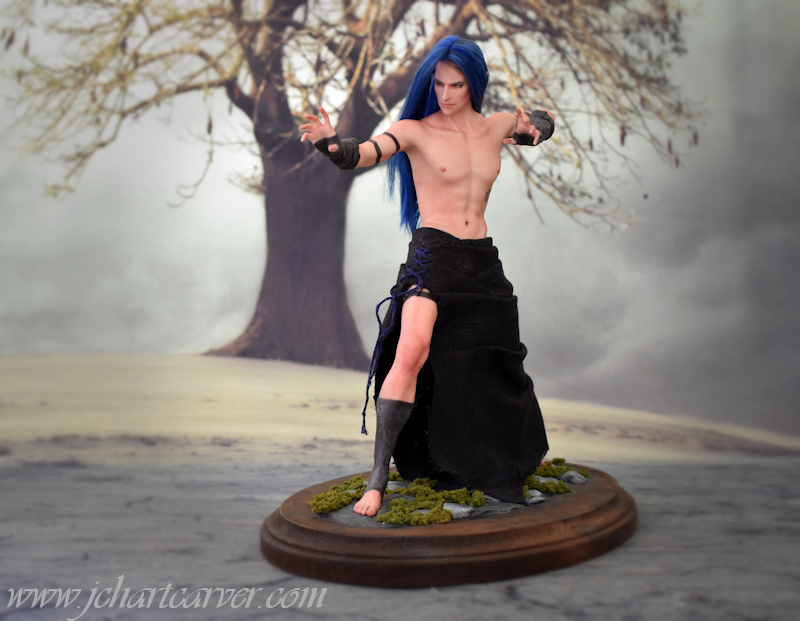
This is Wikshen (my favorite Sufferborn character. Shhh, don’t tell the others). If you haven’t noticed already, Sufferborn is kinda about him, to be honest. He’s more than a novel character to me, though, he’s an artistic outlet. If I’m trying out a new medium—of any type—you can count on seeing Wikshen appear in that medium. Anyway, about this figurine…
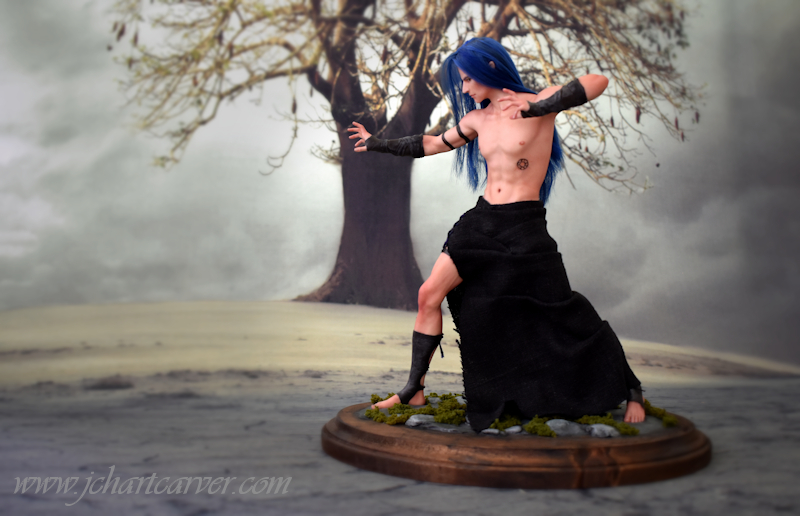
The very first step was sculpting him in the Daz Studio software. I just LOVE that software! I sculpted him using various morphing tools I had to buy to get the job done. I guess you can say he was expensive even to digitally sculpt. And then I used the GamePrint plugin to send my sculpture to the printing company, Mixed Dimensions, to get my sculpture created in real life 3D. It was not cheap, I must say, hahah! This was a high-end pricy little project. He stands at about 9 inches tall and his skin color was printed as well. I only added a few painted elements of my own to enhance his eyes and add his side brand and arm bands, and etc. Some parts of his clothing didn’t print in the color I needed, so I went over those with my own black paint. Consider this post to be a glowing review of all of those services I mentioned: Daz Studio, GamePrint plugin for Daz Studio, and Mixed Dimensions—all highly recommended!

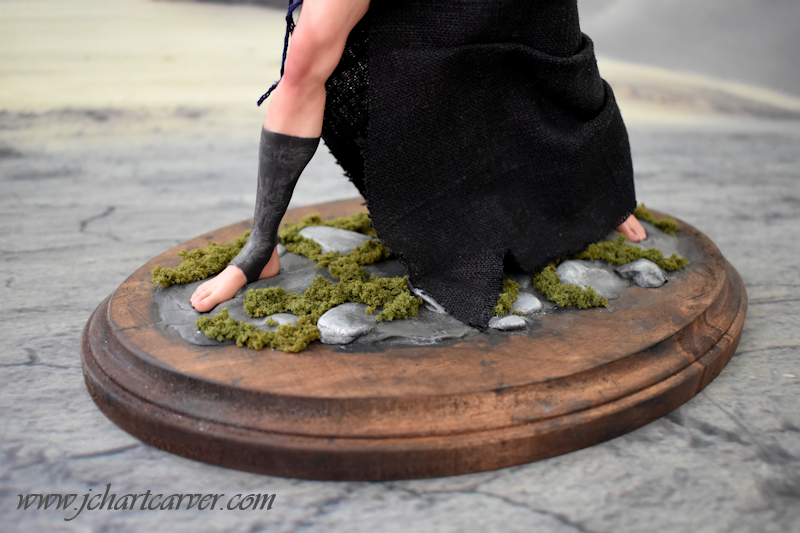
What I actually submitted for printing was an incomplete figure. He had no hair and only wore his underwear. Notice his hair and “battleshift” are both made from organic materials. I wanted this figurine to be partially a hands-on art project for my own personal joy and satisfaction. I had to create the base he is standing on—not because I wanted to, but because I had no idea how the printing process would play out—if I would get a complimentary base or not. It turned out that I was not given a base by default. He arrived as a loose figure who couldn’t stand on his own (poor fella!), so I went to all the trouble to pick out a wooden oval thing from the craft store, stain it, sculpt the rocks and soil using a two-part apoxie, paint it, and added moss for a realistic terrain effect. The finished product turned out better than expected.
And that hair! Thanks to my history of enthusing in the world of Asian ball-jointed dolls, and honing my process for creating wigs, I was able to craft this for the figurine. This part I knew would be a better option than printing his hair from the resin material he’s made of. If I had done that, the figure probably would’ve cost $100 more than it did! I did run through the shopping cart process a few times to figure out my options. So making the hair saved me money, and it looks 100 times better too. I was able to use hand-dyed suri alpaca hair that was left over from a past wig I made (because I totally made a ball-jointed doll of him in the past!). This also makes his hair removeable so I can replace it in case of damage or whatever.

Look at that dirty bastard! The last thing I applied was his battleshift which is made from a scrap of linen I had kicking around. Did I also mention I’m a seamstress? Well, I didn’t actually sew this together, I “sculpted” this garment by cutting and gluing pieces directly onto the figure, so this one is not removeable. His battleshift hides the wire that I used to stabilize the figure to the base, using nothing short of caulk to secure him down, which includes under his feet.
I’m not going to say this project was “simple” or “easy” but it probably wasn’t an expert-level project either. I was able to alleviate my chores a bit by ordering a color printed sculpture instead of primed. The tasks I did take on required a bit of planning and know-how. For instance, I also had to invent a way to let the figure stand safely on his own without facing the risk of falling and breaking off one of those gorgeous, tiny fingers while I worked on him. To do this, I glued a Styrofoam “brick” to a flat piece of cardboard, carved foot holes into the Styrofoam and, voila, he had a temporary stand to prop him up while I crafted his wig.
I have a few mixed feelings about continuing this as a hobby. 1. Yes, of course I want to do another one! He looks lonely without his Kalea to stand there being impressed (or horrified) by his antics, heehee! 2. But it was such an “extra” thing for me to juggle. It took a long time to finish just because each session was spread out across weeks and weeks. I could only work on it a little bit at a time each weekend, sometimes skipping weekends. 3. It’s an expensive hobby…But who am I kidding? I LOVE doing arts and crafts and don’t mind spending money on a project! 4. Um…there isn’t really a fourth feeling. I enjoyed doing this but it’s not very convenient. I’ll just play it by ear. Maybe you’ll see a Kalea figurine in the next year, who knows? Until then I have a Book 3 to finish and a computer to build. Yep, I’m still working on that computer. It will make my future of using Daz Studio a bright one.
Thank you for reading this! If you catch me at a convention in the future, I will most likely have this little guy on my table to make it look cool. He’s a one of a kind.
God Bless!
P.S. I did a little filming as I worked on this project, so you can expect a creation video on Youtube soon…just gotta get that new computer running (*sigh*).
